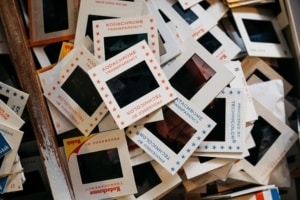
Preserving family memories often means safeguarding cherished photographs that have weathered decades of change. As time passes, these images can fade, become damaged, or even disappear altogether. Many families are searching for reliable ways to ensure their history remains vibrant for generations. One of the most effective solutions people often search for is Negative Scanning, a process that converts photographic negatives into high-quality digital files, making it easier to archive, share, and restore precious moments.
Why Digitize Old Photos and Negatives?
Traditional photographs and negatives are susceptible to a range of environmental threats, including moisture, sunlight, dust, and physical handling. Over time, these factors can cause irreversible damage, leading to faded images or even total loss. Digitizing your negatives at home not only preserves the original quality but also provides the flexibility to make unlimited copies, edit or restore photos, and share them effortlessly with friends and family.
Getting Started: What You Need
Preserving your old photos at home is more accessible than ever, thanks to advances in consumer technology. To begin, gather the following essential tools:
- Film Scanner or Flatbed Scanner with Negative Adapter: These devices are designed to read photographic negatives, producing high-resolution digital images.
- Clean Workspace: Dust and fingerprints can affect the scanning quality, so a clean, well-lit area is important.
- Photo Editing Software: Software allows you to crop, adjust colors, and remove flaws from scanned images.
- Archival Gloves and Cleaning Supplies: These help prevent oil transfer and remove debris from negatives before scanning.
Step-by-Step Guide to Scanning Negatives
1. Organize Your Negatives: Sort negatives by date, event, or subject to streamline the scanning and labeling process.
2. Clean Negatives Carefully: Use a blower brush or lint-free cloth to gently remove dust and particles.
3. Set Up the Scanner: Follow the manufacturer’s instructions for installing and configuring your scanner or negative adapter.
4. Scan at High Resolution: For best results, scan at a minimum of 2400 DPI. This ensures clarity and allows for future enlargements or edits.
5. Save and Name Files: Use descriptive file names and organize folders by year or event for easier retrieval later.
6. Edit and Restore: Utilize photo editing software to correct color, fix scratches, or enhance faded images.
7. Backup Your Files: Store digital copies on multiple devices or cloud services to prevent accidental loss.
Tips for Long-Term Photo Preservation
- Store Originals Safely: Even after digitization, keep negatives and prints in acid-free envelopes or boxes in a cool, dry place.
- Regularly Update Backups: Technology changes rapidly, so refresh your backup methods and check file integrity periodically.
- Share and Print: Create photo books or prints to enjoy and distribute among family members, ensuring your memories remain accessible.
Preserving old photos using a home scanning approach not only safeguards treasured images but also brings families together through shared history. By taking the time to digitize your negatives, you’re investing in a legacy that can be enjoyed by future generations. Simple steps and a bit of care can turn fragile, fading memories into vibrant, lasting keepsakes—ensuring the stories behind every photo remain alive for years to come.